Willesden Green NW10 End of Tenancy Cleaning Checklist Brent
If you are moving out in Willesden Green, NW10, the last thing you want is a rushed final clean turning into a deposit dispute. A proper Willesden Green NW10 end of tenancy cleaning checklist Brent gives you a clear, room-by-room plan so you can hand the property back in the right condition. It also helps you separate what is genuinely your responsibility from what should be handled by normal fair wear and tear. That distinction matters more than people realise. In our experience, a calm, structured clean saves time, money, and a lot of last-minute stress.
This guide walks you through what an end of tenancy clean usually involves, how to tackle each area of the property, what landlords and letting agents commonly expect, and where professional help can make all the difference. You will also find a practical checklist, a comparison table, and a few realistic examples from everyday move-outs in North West London. Nothing fancy. Just the stuff that actually helps.
Table of Contents
- Why Willesden Green NW10 end of tenancy cleaning checklist Brent Matters
- How Willesden Green NW10 end of tenancy cleaning checklist Brent Works
- Key Benefits and Practical Advantages
- Who This Is For and When It Makes Sense
- Step-by-Step Guidance
- Expert Tips for Better Results
- Common Mistakes to Avoid
- Tools, Resources and Recommendations
- Law, Compliance, Standards, or Best Practice
- Options, Methods, or Comparison Table
- Case Study or Real-World Example
- Practical Checklist
- Conclusion
- Frequently Asked Questions
Why Willesden Green NW10 end of tenancy cleaning checklist Brent Matters
End of tenancy cleaning is not just a deep tidy. It is the final presentation of the property before check-out inspection, inventory review, and handover. If a flat in Willesden Green has been lived in for a year or two, the usual build-up shows up in the obvious places: oven grease, bathroom limescale, skirting dust, fingerprints on switches, crumbs in drawer corners, and that awkward mark behind the sofa where nobody ever looked. The checklist keeps those details from slipping through the net.
In Brent, rental homes range from compact studio flats to larger family houses, and the condition standards can vary a bit depending on the landlord, letting agent, and inventory report. That is why a generic "clean the place" approach is risky. A proper checklist gives you sequence and control. It also helps you spot the jobs that often need extra time, such as oven cleaning, carpet cleaning, or window cleaning, which are easy to underestimate when you are in a hurry.
Let's face it, most move-outs happen when you are already juggling keys, removals, utility transfers, and a hundred little admin tasks. The checklist stops the cleaning from becoming guesswork. It gives you a proper order: top to bottom, room by room, detail by detail. Simple, but very effective.
How Willesden Green NW10 end of tenancy cleaning checklist Brent Works
The checklist works best when you treat the property like an inspection document rather than a normal weekly clean. That means you are not just wiping visible surfaces. You are checking the hidden and fiddly areas that inventory clerks often notice straight away.
A strong end of tenancy clean usually follows this pattern:
- Declutter first. Remove all belongings, rubbish, loose items, and forgotten bits from cupboards and drawers.
- Clean from the top down. Dust high points first so debris falls onto surfaces you have not cleaned yet.
- Work room by room. Kitchen, bathroom, bedrooms, living areas, hallways, and any communal or external spaces.
- Deal with problem areas early. Grease, limescale, mould spots, stains, and odours often need pre-treatment.
- Finish with inspection details. Switches, handles, frames, sockets, behind appliances, and skirting boards.
In practical terms, the checklist turns the job into a controlled process. That matters because end of tenancy work is full of overlap. If you clean the kitchen before removing limescale from the bathroom mirrors, you may end up redoing surfaces. Bit annoying, really.
Many tenants also choose a combination of self-cleaning and specialist help. For example, they might handle general surfaces themselves, then bring in professionals for deep cleaning or specific tasks like steam carpet cleaning and upholstery cleaning. That hybrid approach often makes sense when time is tight or the property has stubborn marks.
Key Benefits and Practical Advantages
The biggest benefit is obvious: a cleaner handover reduces the chance of deductions tied to cleaning standards. But there are other advantages too.
- Less stress on moving day. A checklist breaks the work into manageable parts.
- Better consistency. You are less likely to miss small details.
- Clearer budgeting. You can see which tasks you can do yourself and which may need a specialist.
- Faster final inspection. A tidy, well-presented home is easier for an agent or landlord to review.
- Better odour control. Kitchen smells, pet odours, and damp patches are easier to tackle when you plan ahead.
There is also a psychological benefit. A property that looks properly cared for feels finished. The place no longer looks half-lived in, which is often what gives people that last-minute panic. You know the feeling: one room looks fine, then you open a cupboard and find a small dust universe. Happens to the best of us.
For larger cleans, the practical advantage is even stronger. Pairing the checklist with services such as one-off cleaning or move-out cleaning can save you from doing the same job twice. If the property includes fabric furniture, curtains, or a worn mattress, then curtain cleaning and mattress cleaning can make a visible difference.
Who This Is For and When It Makes Sense
This checklist is for anyone handing back a rented property in Willesden Green, NW10, but it is especially useful if you are:
- a tenant preparing for final inspection
- a flatmate dividing cleaning tasks before move-out
- a landlord getting a property ready for re-let
- a letting agent arranging cleaning standards between occupancies
- a homeowner moving between properties and wanting a clean break
It also makes sense if the property has had a busy year. Families, sharers, pet owners, and short-term tenants tend to face more stubborn build-up. If pets were involved, odour issues and hidden staining can require more than a quick tidy. That is where pet stain odour removal becomes genuinely useful rather than just a nice extra.
If you are moving into a new place right after moving out, a checklist is useful in both directions. You may be cleaning the old home, but you are also trying to make the new one liveable quickly. In those cases, move-in cleaning is often worth considering for the next property, because nobody wants to unpack plates in a dusty kitchen.
Step-by-Step Guidance
1. Start with a full walkthrough
Walk through every room before you clean a single thing. Open cupboards, check under sinks, look behind doors, and note problem areas. This is where you identify stains, damaged seals, grubby grout, or anything that needs a special cleaner or more time.
2. Remove everything that is not part of the property
Take away rubbish, food, toiletries, old tapes, and forgotten possessions. Empty bins fully. If you are still living there during the final days, keep a small caddy for items you use daily so you do not keep undoing your own work.
3. Tackle the kitchen properly
The kitchen is usually the hardest room. Clean the oven, hob, extractor, sink, taps, splashbacks, cupboard fronts, tile grout, and appliance exteriors. Pull out movable appliances if you can do it safely, then clean behind and beneath them. If you have ever seen the layer of crumbs and oil behind a fridge, you know why this matters.
A specialist oven cleaning service can help with baked-on grease and burnt residue that normal cleaning products struggle with. For stubborn surfaces or stained worktops, stain removal may be needed on a case-by-case basis.
4. Clean bathrooms with detail in mind
Bathrooms need limescale removal, sanitising, mould spot treatment, and a lot of patience. Focus on toilets, baths, showers, sinks, taps, mirrors, seals, extractor fans, tiles, and behind the toilet base. If the shower screen has water marks or the grout has gone dull, do not leave it until the end.
5. Refresh bedrooms and living areas
Dust light fittings, wardrobes, shelves, skirting boards, doors, handles, sockets, and window ledges. Vacuum floors thoroughly, including under beds and sofas where possible. If the property has fabric furniture left behind, sofa cleaning and rug cleaning can help remove visible marks and general dullness.
6. Finish with floors, carpets, and glass
Floors are the final stage because they collect dust from everything else. Sweep and vacuum first, then mop hard floors using an appropriate product. For timber, vinyl, or tile, a proper hard floor cleaning approach can restore a more even finish. Clean internal windows, sills, and frames, and make sure the glass is streak-free. Natural light shows everything, unfortunately.
7. Re-check the tiny details
Go back and inspect switches, skirting, door edges, handles, extractor grilles, and high corners. These are the little things that make the clean look complete. If the property had building dust or recent repairs, an after builders cleaning style approach may be useful for the final pass.
Expert Tips for Better Results
The best tip is also the least glamorous: start earlier than you think you need to. A same-day clean before key handover is stressful and rarely ideal. Give yourself breathing room for drying time, especially after carpets, upholstery, or bathroom work.
Second, work with the right order. Clean high to low. Dry dust before wet cleaning. Vacuum before mopping. Simple rules, but they prevent mess from moving around the property.
Third, treat smell as part of cleanliness. A room can look clean and still feel off if there is stale cooking odour, damp fabric, or pet smell. Air the property well, and consider targeted treatment where needed. If soft furnishings are holding odours, pet stain odour removal and upholstery cleaning are often more effective than masking products.
Fourth, keep your inventory report nearby. Match your clean to the property's condition at the start of the tenancy if you can. That is the sensible benchmark, not some unrealistic showroom standard.
And one small but useful thing: photograph the finished rooms once the clean is done. Not for drama. Just for evidence and peace of mind. A phone photo in good daylight can save a lot of back-and-forth later.
Common Mistakes to Avoid
- Leaving the oven until last. It often takes longer than expected.
- Cleaning around clutter. You need clear access to do the job properly.
- Skipping inside cupboards and drawers. Inventory checks often include them.
- Forgetting windows, frames, and ledges. These are easy to miss and very visible.
- Using the wrong product on delicate surfaces. Harsh chemicals can damage worktops, wood, or sealants.
- Ignoring limescale and grout. Bathrooms can look half-done if these stay untouched.
- Assuming carpets only need a vacuum. Some properties need proper steam or stain treatment.
A common one in move-outs is cleaning too late in the day. By the time you finish, you are tired, the light is poor, and the job starts to look worse than it is. Morning light or early afternoon is usually kinder. Small thing, but it helps.
Another mistake is forgetting shared spaces. If you are leaving a flat with a communal hallway, stairwell, or shared entrance, the standard may include those touchpoints too. For that kind of area, communal area cleaning can be relevant if it is part of your agreement or building arrangement.
Tools, Resources and Recommendations
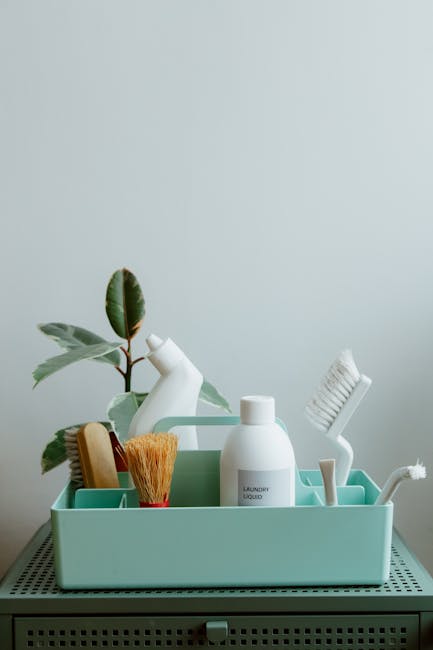
You do not need a van full of equipment to do a decent end of tenancy clean, but the right tools help a lot. A good starter kit would include:
- microfibre cloths
- vacuum cleaner with attachments
- mop and bucket
- non-abrasive sponges
- degreaser
- limescale remover suitable for bathrooms
- glass cleaner
- scraper or plastic blade for safe residue removal
- rubber gloves
- bin bags and storage boxes
For fabrics, choose the method carefully. Curtains, sofas, rugs, and mattresses respond differently to moisture and detergents. That is why specialist services such as steam carpet cleaning, curtain cleaning, and mattress cleaning can be more efficient than trying to improvise.
If you are deciding whether to do the work yourself or book help, it can also be useful to review pricing and quotes before the move. That way you can compare the time, effort, and likely finish without guessing. For service standards, it is also sensible to read the company's terms and conditions, insurance and safety, and health and safety policy so you know how work is handled on site.
Law, Compliance, Standards, or Best Practice
For renters in the UK, the key point is not to overcomplicate the law. End of tenancy cleaning is usually about meeting the condition expected under the tenancy agreement, the inventory, and fair wear and tear principles. The exact wording can vary, so it is wise to check your agreement rather than assume a universal rule. If the place was already marked as worn at move-in, that matters.
In practice, most disputes turn on evidence: the inventory check-in report, photos, and the level of cleanliness at handover. That is why a documented checklist is so helpful. It shows you worked methodically and did not just do a surface clean.
From a best practice point of view, safe use of products matters too. Use cleaners according to instructions, ventilate rooms, and avoid mixing chemicals. Simple, but worth saying. Also, if you are cleaning around electrical sockets, damaged seals, or possible mould, be cautious and do not force it. Some jobs need specialist attention rather than brute force.
If you are using a professional service, check that they are clear about safety and process. That is one reason people look at a provider's about us information and service policies before booking. A decent cleaner should be able to explain what is included, what is excluded, and what preparation they need from you. No mystery. No hidden drama.
Options, Methods, or Comparison Table
There is no single right way to handle an end of tenancy clean. It depends on the condition of the property, your timing, and how much physical work you can realistically take on during a move. Here is a straightforward comparison.
| Approach | Best for | Pros | Trade-offs |
|---|---|---|---|
| DIY checklist clean | Small, lightly used properties | Lowest direct cost, full control | Time-consuming, easy to miss detail work |
| Hybrid clean | Homes with specific problem areas | Balances cost and results | Needs good coordination |
| Professional end of tenancy clean | Busy move-outs, larger homes, tougher deposits at stake | Efficient, detailed, less stress | Higher upfront spend |
For many tenants in Willesden Green, the hybrid option is the sweet spot. You handle personal items, light dusting, and basic tidying, while booking help for carpets, ovens, or deep surface work. It is often the most sensible route, especially when the move-out date is already packed.
Case Study or Real-World Example
A common scenario in NW10 goes like this: a couple in a two-bedroom flat have packed everything by Thursday evening, the removals are booked for Friday morning, and the checkout is scheduled for the following day. They are tired, the kitchen has a baked-on oven residue, and the bedroom carpet has a few visible marks from a long winter of shoes, rain, and everyday life. Not a disaster. Just normal rental wear, really.
Instead of trying to do everything in one exhausted push, they split the work. One person clears cupboards and bins, the other handles bathrooms and surfaces. They then bring in targeted support for the heavier tasks: oven cleaning for the kitchen, steam carpet cleaning for the carpets, and a final pass of window cleaning to brighten the rooms.
The result was not perfection in the fantasy sense. It was better than that. It was tidy, consistent, and credible. The property looked properly handed back, which is what actually counts. Sometimes a clean does not need to be dramatic; it just needs to be complete.
Practical Checklist
Use this checklist as your final walk-through before handover. If you are short on time, focus on the bold items first.
- All belongings removed
- All bins emptied and liners replaced
- Kitchen cupboards emptied, wiped, and checked
- Oven, hob, extractor, and splashback cleaned
- Fridge and freezer defrosted and wiped
- Sinks, taps, and drains cleaned
- Bathrooms descaled and sanitised
- Toilet, bath, shower, screen, and seals cleaned
- All skirting boards, doors, handles, and switches wiped
- Light fittings, vents, and ledges dusted
- Carpets vacuumed or professionally cleaned if needed
- Hard floors swept and mopped
- Rugs, sofas, or mattresses treated if applicable
- Internal windows, frames, and sills cleaned
- Mirrors and glass left streak-free
- Odours checked and addressed
- Photos taken of each cleaned room
- Keys, remotes, and access items gathered for return
If you want a broader domestic reset before or after the move, domestic cleaning or house cleaning can be a useful complement, especially if the property needs more than a standard end-of-tenancy finish.
One last practical note: if you have had renovation dust, plaster residue, or a lot of moving traffic through the property, you may need a stronger finish than a basic surface clean. In that case, one-off cleaning is often the simplest way to frame the job.
Get a free quote today and see how much you can save.
Conclusion
A good Willesden Green NW10 end of tenancy cleaning checklist Brent is less about making the property look perfect and more about making the handover smooth, fair, and defensible. When you clean systematically, document the result, and deal with the awkward spots properly, you give yourself the best chance of a calm checkout. That is the real goal.
If you are unsure whether to do everything yourself or bring in help, start with the hardest rooms and the messiest items first. Ovens, carpets, bathrooms, and fabric furnishings usually tell you the answer pretty quickly. And if the move already feels like too much, that is okay. Most people feel that way at this stage. One step at a time, that's all it is.
Handled well, the final clean becomes a finishing touch rather than a battle. And honestly, that's a nicer way to leave any home behind.
Frequently Asked Questions
What should be included in an end of tenancy cleaning checklist in Willesden Green NW10?
It should cover every room, including the kitchen, bathroom, bedrooms, living areas, floors, windows, cupboards, appliances, and small detail points like switches, skirting boards, and handles. The best checklist also includes odour checks and a final inspection pass.
Do I need professional cleaning for the whole property?
Not always. Some tenants clean the property themselves and only book help for problem areas such as the oven, carpets, or upholstery. If time is short or the property is heavily used, full professional help can be the safer choice.
Are carpets always expected to be cleaned at move-out?
Not in every tenancy, but carpets are commonly inspected. If they are stained, heavily used, or smell stale, a proper clean is usually sensible. A vacuum alone is rarely enough for a visible improvement.
How long does end of tenancy cleaning usually take?
It depends on the property size and condition. A small flat may take several hours, while a larger home can take much longer. If ovens, carpets, or bathrooms need intensive work, allow extra time. More than you think, usually.
What are the most commonly missed areas?
Inside cupboards, behind appliances, extractor fans, skirting boards, door frames, and window tracks are often forgotten. These are exactly the places that show up during final checks, which is why the checklist is so useful.
What if the property has pet smells or pet stains?
Then you should treat odour and staining separately, not just with general cleaning. Targeted pet stain odour removal, along with upholstery or carpet treatment, can make a big difference to the final result.
Is a deep clean the same as end of tenancy cleaning?
They overlap, but they are not identical. A deep clean is a broad intensive clean, while end of tenancy cleaning is focused on return condition, inspection readiness, and handover standards. End of tenancy work is usually more detail-driven.
Should I keep photos after cleaning?
Yes. Clear photos give you evidence of the property's condition at handover. They can be helpful if there is any disagreement later. Nothing dramatic, just sensible documentation.
What if I am moving out of a flat with communal areas?
Check whether the shared entrance, hallway, or stairwell is included in your responsibilities. In some buildings, communal area cleaning may be relevant, especially if the tenancy agreement or building rules set expectations.
How do I decide between DIY cleaning and hiring help?
Look at three things: time, property condition, and risk. If the place is small and lightly used, DIY may be enough. If the oven is grimy, the carpets are marked, or the checkout is close, professional support can save a lot of effort.
What cleaning products should I avoid?
Avoid mixing chemicals and be careful with harsh products on wood, stone, delicate paint, and seals. Always test a small area first if you are unsure. When in doubt, gentler products and more patience usually beat aggressive scrubbing.
Can I get cleaning help for just one part of the property?
Yes. Many people only need targeted help such as oven cleaning, carpet cleaning, window cleaning, or upholstery cleaning. That can be a practical compromise when you have already done most of the work yourself.